Superimposing in Cephworx

To superimpose pre and post:

  • From the main screen, load the tracing session for POST
  • Once it’s loaded, change the “Active/Current Analysis” color on the left side from Full Color to red (this is your POST color)
  • Check the “Superimpose Session” at the bottom left, then click the Session Setup button
    • Choose your first superimposition tracing (we’ll use PRE for this one)
    • Change the “Layer Color” from Full Color to black (the PRE color)
    • Be sure “Full Scaling” is toggled on
    • Be sure “Grab Handles” is toggle off (these are the points you grab to adjust, but since we can’t adjust the superimp layers, this hides them)
    • Click “Load”
  • You should see both tracing layers loaded on top of each other
    • If you are adjusting the image, note that only the “Active/Current Analysis” can be adjusted – the other two are just visually superimposed. Normally, you wouldn’t adjust anything as each tracing has been previously completed
  • You can then directly Print/Export the superimposition by clicking on the printer or disk in the lower right
    • For Caseworx, you’ll want to use the Disk -> Export -> Export to File
    • Under the “Overlay Options” in the preview screen, be sure that the Superimposed Session item is checked. The settings should copy themselves in from the tracing automatically
      • Remember that “Superimposed Session” is the PREYou can also set the colors differently here should you need to. For IBO, Pre=Black, Red=Post, Green=Post+2

      • Be sure the “Show All Items” toggles are turned off – we only want the superimposer data from the script

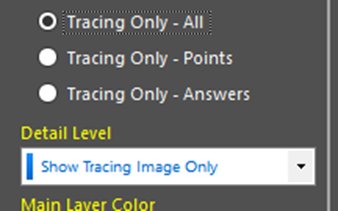
      • Under the “Tracing Image Options”, select the “Tracing Only – All” button – this hides the radiograph in the backgroundSet the “Detail Level” dropdown to “Show Tracing Image Only” – this disables the landmark labeling for a cleaner tracingAdjust the “Drawing Line Bias” if you want to make the lines thicker/thinner

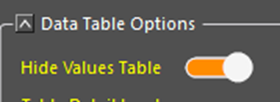
    • Under the “Data Table Options”, toggle the “Hide Values Table” to on – we only want the image and don’t need the data for superimposition

    • At the bottom left of the Preview screen, toggle the “Anonymize Identifiers” – this disables the nameplate to hide the patient & office names
  • This file is the two-way superimposition that’s ready to Import into Caseworx!

Antivirus False Warnings

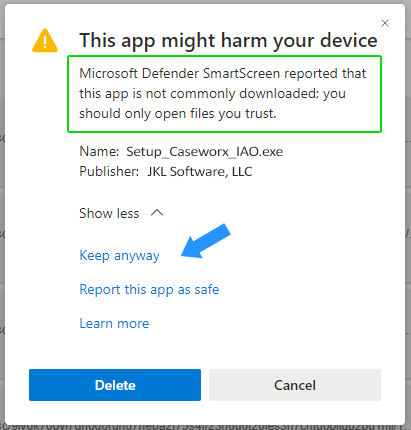
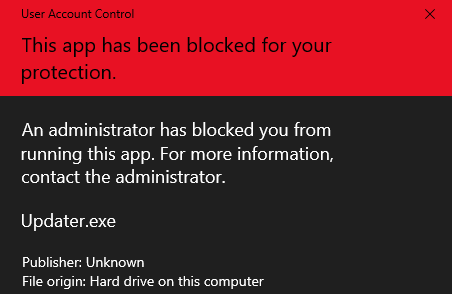
Some users have reported issues with Caseworx or TODDS not starting with a warning from their antivirus software, usually complaining of something to do with reputation.

Poorly written antivirus software, such as AVG and AVAST, have an expectation of “good” software to include the definition of being installed by thousands of users. Specialty software, such as Caseworx or TODDS, would obviously not be installed by the average consumer in the thousands. It is obvious that these antivirus programs may be fine for consumer home applications, but is not designed for professional business environments.

Until such AV systems become more advanced and intelligent, users can add an exception to their antivirus “whitelist” or “exception” configuration for the C:\Program Files\JKL Software\TODDS or C:\Program Files\JKL Software\Caseworx-IAO folder to ensure uninterrupted operation of their software. However, whitelisting can also expose the folder to possible infection as the AV cannot monitor the folder and it’s files for changes.

It is therefore our recommendation that a proper antivirus solution which does not exhibit issues like the above named software be used to protect your computers.

Software such as Symantec’s EndPoint Security with it’s well written Insight engine does not exhibit this issue and allows the software to operate successfully without any problems.

Microsoft .NET 4.7 installation problem or “blocked” by installer

Some computers installed with Microsoft Windows 7 may not install the .NET Framework 4.7 update correctly. Computers which are not updated to the .NET Framework 4.7 may be prompted to install the Framework when starting TODDS or Caseworx after an update, but do not complete successfully with an error message.

Users of Windows 10 and 8.1 should experience no issues with the .NET 4.7 update. However, Windows 7 and 8 users may get a message from the Microsoft update package for .NET 4.7 stating that their update was blocked. The required file that needs to be installed is available from Microsoft at the following URL: https://support.microsoft.com/en-us/help/4020302/the-net-framework-4-7-installation-is-blocked-on-windows-7-windows-ser

Once this patch has been installed, users can then successfully install the .NET 4.7 Framework. Users can also directly install the .NET 4.7 Framework from the following URL: https://www.microsoft.com/en-us/download/details.aspx?id=55167

If the Framework appears to install correctly, but still persists with erratic program behavior, reboot the computer and try the program again.

Caseworx Updater Loop

Some users of Caseworx who have not updated the software for a few versions may experience what seems to be an update loop. The updater normally may run up to two or three times, as it updates itself and then other components. However, if the updater persists to run, your copy of Caseworx may have exceeded the updater’s capabilities.

Some recent changes to Microsoft Windows 10 and the .NET Framework 4.7 have resulted in changes to Caseworx to better perform with the new Windows version, as well as high-DPI screens or “Retina-style” displays. These changes require the usage of some of these components.

If you are experiencing any of these symptoms, simply uninstall the copy of Caseworx on your computer from the Control Panel->Programs and Features. Then, download the newest copy of the Caseworx installer from http://8d585dc.online-server.cloud/downloads/Setup_Caseworx_IAO.exe. Your data files and cases will be preserved across the uninstall/re-install process.

Dentrix Error After Update/Install

It has been noted that some versions of Dentrix is incompatible with Microsoft’s .NET 4.6 and Windows 10. Users who update their Windows Vista, 7, 8, or 8.1 to .NET 4.6 may find that some or all parts of Dentrix may not function correctly after the update.

Caseworx and TODDS install .NET 4.6 by default if not found, but can also run under .NET version 4.5.2. If problems are noted after the .NET Framework update, contact Dentrix Support for update procedures required to patch their older software to the current version. This is NOT an error with your Windows install, computer’s hardware, and/or JKL Software’s products.

Dentrix information for .NET 4.6 and Windows 10 can be found here: http://dentrix.com/windows10

As of the publish date of this support article, the Dentrix patch can be found on their website at http://dentrix.com/support/resource-center/guest/articleid/74207 . The patch can be downloaded from the link by clicking on the “Attachments” link on the page.

“Unknown Hard Error” during Microsoft .NET 4.5.1 – 4.6 update (or install)

Some installations of Caseworx and TODDS have exhibited an error showing “Unknown Hard Error” and not completing the Microsoft .NET Update for versions 4.5.1, 4.5.2, and 4.6. This may occur during the installation of the product,  or after an update. The error does not occur in the program itself, but rather the Microsoft installer that is updating the .NET technology.

Cause:

The most common cause seems to be that the Microsoft RyuJIT preview was installed on the machine at one time. This preview version prevents the final version in .NET 4.6 from completing the install

Resolution:

The preview version must be removed and all traces of it’s registry/environment must be reset.

Steps:

The following involves editing the registry and environmental variables. If you are unsure or uncomfortable performing these steps, contact your IT professional.

  1. Open the Registry Editor and look for the following key:
    HKEY_LOCAL_MACHINE\SOFTWARE\Microsoft\.NETFramework\AltJit
    If found, remove the key from the registry. Also, check the left side of the registry editor or any subkeys labeled “AltJit”. If found, remove the subkey also.
    —–
    OR
    —–
    Download the following registry file and double-click it to clear the setting (you can safely ignore any browser/antivirus warnings, it only removes the above listed entry):
    http://8d585dc.online-server.cloud/downloads/removeAltJit.reg
  1. Go to Control Panel, System, “Advanced System settings” (left side). On the panel that appears, click the “Environment Variables” button at the bottom. Look at the bottom of the window that appears in the section titled “System Variables” and look for an item named “COMPLUS_AltJit”. If found, highlight and delete it.
  1. Then, go to Control Panel, Programs and Features, and look for “Microsoft .net RyuJIT Preview”. Uninstall it if found. Also, look for Microsoft .NET Framework 4.6. Uninstall it if found.
  2. Install the Microsoft .NET 4.6 Framework from http://www.microsoft.com/en-us/download/details.aspx?id=48130 You may be asked to reboot your computer. Perform the reboot if asked.
  3. Start TODDS/Caseworx, it may or may not ask for the .net 4.6 update. If it does require additional .net items, proceed with the .net update. It should succeed with these items cleared.
  4. If you continue to get the “Unknown Hard Error” message, and did not reboot in step 4, perform a reboot – a Windows program that was running probably prevented all files from updating successfully.

Contacting JKL Software for Support

For Product Information and Ordering:

E-mail: info@jklsoftware.com

Product Support:

E-mail: support@jklsoftware.com

Please describe, in detail, your support request. Be sure to include the following information:

  • Product name
  • Product version (usually on startup screen or under the “Help”->”About” menu)
  • What you were doing when the issue occurred
  • Include any notification message, screenshots, or messages that you saw

Most of our applications also have a “Generate Diagnostic File” menu item in the “Help” menu. It can be useful to generate this file and attach it to your email to help us narrow down the issue.

We will contact you once we have investigated your request, usually within 1 business day. Most of the time, we will get back to you much sooner!

Note that we cannot be of much help if the issue is about your computer, network, or other physical issue. You would need to contact your IT staff to resolve “in-house” issues.

Product Updates

JKL products are usually updated directly from the software itself at start time. Many of the products also feature a “Check for Update” menu link in the “About” or “Help” menus. These updates are included in all products unless specified in the products licensing agreement. Updates only apply to minor revision changes and bug fixes. For example, in the version number 2.1.4500.1000, the minor revision is 1.4500. Updates are included as long as the “2” does not change. A change in the “2” for this example would be considered a major product release.

To upgrade from a previous version to the newest major version, contact JKL Software.