To superimpose pre and post:
- From the main screen, load the tracing session for POST
- Once it’s loaded, change the “Active/Current Analysis” color on the left side from Full Color to red (this is your POST color)

- Check the “Superimpose Session” at the bottom left, then click the Session Setup button
- Choose your first superimposition tracing (we’ll use PRE for this one)
- Change the “Layer Color” from Full Color to black (the PRE color)
- Be sure “Full Scaling” is toggled on
- Be sure “Grab Handles” is toggle off (these are the points you grab to adjust, but since we can’t adjust the superimp layers, this hides them)
- Click “Load”
- You should see both tracing layers loaded on top of each other
- If you are adjusting the image, note that only the “Active/Current Analysis” can be adjusted – the other two are just visually superimposed. Normally, you wouldn’t adjust anything as each tracing has been previously completed
- You can then directly Print/Export the superimposition by clicking on the printer or disk in the lower right
- For Caseworx, you’ll want to use the Disk -> Export -> Export to File
- Under the “Overlay Options” in the preview screen, be sure that the Superimposed Session item is checked. The settings should copy themselves in from the tracing automatically
- Remember that “Superimposed Session” is the PREYou can also set the colors differently here should you need to. For IBO, Pre=Black, Red=Post, Green=Post+2
- Be sure the “Show All Items” toggles are turned off – we only want the superimposer data from the script
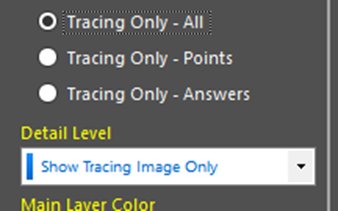
- Under the “Tracing Image Options”, select the “Tracing Only – All” button – this hides the radiograph in the backgroundSet the “Detail Level” dropdown to “Show Tracing Image Only” – this disables the landmark labeling for a cleaner tracingAdjust the “Drawing Line Bias” if you want to make the lines thicker/thinner
- Under the “Overlay Options” in the preview screen, be sure that the Superimposed Session item is checked. The settings should copy themselves in from the tracing automatically
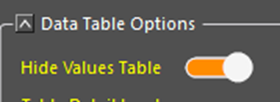
- Under the “Data Table Options”, toggle the “Hide Values Table” to on – we only want the image and don’t need the data for superimposition

- At the bottom left of the Preview screen, toggle the “Anonymize Identifiers” – this disables the nameplate to hide the patient & office names

- Under the “Data Table Options”, toggle the “Hide Values Table” to on – we only want the image and don’t need the data for superimposition
- This file is the two-way superimposition that’s ready to Import into Caseworx!


