Overzealous Smartscreen Prevents Downloading

Recent versions of the Microsoft Defender Smartscreen are ridiculously overzealous and make it difficult for users to install any software unless there are millions of public users installing it constantly. As such, you may get a set of warnings during the download and/or install process of Caseworx or Cephworx. If you encounter such an issue, you can temporarily disable Smartscreen Reputation-based security in your web browser (if available, such as in Microsoft Edge) OR manually allow the file to save and run (Edge, Chrome, others).

To temporarily disable Smartscreen: Open up the Settings for your browser. Typically, this is via the 3-dot button in the upper-right corner or menu “System Settings”. Search for ‘Security’ or go to the “Privacy, search, and services” tab. Find and disable “Microsoft Defender Smartscreen” and/or “Block potentially unwanted apps”. Then, download and install Caseworx/Cephworx.

To manually accept the file download, click on the download link, then check the “Downloads” menu item of the web browser. This is typically a down-pointing arrow in the upper-right of the browser window. You should see the file downloading in this panel. A message may appear next to the download and/or a set of Keep/Discard buttons may appear.

Once the download has completed, hover over the link in the Downloads panel. A 3-dot button will appear that can be clicked. A menu will appear with a “Keep” link to allow you to commit the downloaded file to your computer.

The file should now be saved to your downloads location, typically the Downloads or Desktop folders on your computer.

Find the downloaded file on the computer, right-click on the file and go to “Properties”. At the bottom of the properties panel, you may see a message that “blocks” the file since it was downloaded from the Internet. If this exists, check the “Unblock” box and press OK to allow the installer to run.

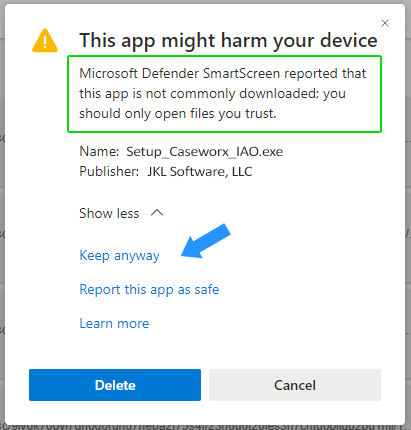
Microsoft Edge / Windows 11 may present a different looking dialog like the one below. Simply click the “Show More” arrow to get additional options. Then, click the “Keep Anyways” link.
Once the file has successfully downloaded onto your computer, you can continue to execute the installer and install Caseworx/Cephworx to your computer.

Don’t forget to re-enable Smartscreen if you want it active on the computer. However, the most common recommendation nowadays is to DISABLE Smartscreen, and leave it disabled, as it is not an effective product and causes more problems than it’s worth!
Certificate Error / Unable to Update

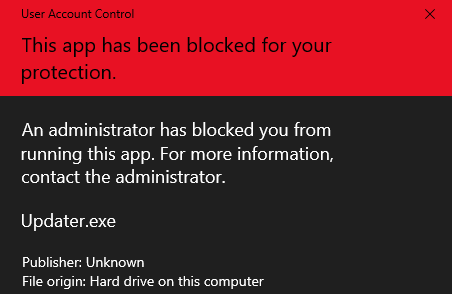
A recent signing certificate error from Sectigo has caused some computers to not allow the starting or updating of Cephworx and/or Caseworx. If you have Microsoft UAC errors, Smartscreen errors, or otherwise cannot run the Updater when starting one of these programs, a screen similar to the following may appear:

To resolve the issue, one of the following will need to be performed to resume proper operation:

  • Manually forcing the Update (ignore the error)
  • Temporarily disable Smartscreen for Windows
  • Temporarily disable User Access Control (UAC) for Windows
  • Download the newest installer for the program and install over the existing files (your data will not be affected)
    • For Caseworx: download the newest installer from here: Caseworx Installer
    • For Cephworx: download the installer from your original “blue” license e-mail

Superimposing in Cephworx

To superimpose pre and post:

  • From the main screen, load the tracing session for POST
  • Once it’s loaded, change the “Active/Current Analysis” color on the left side from Full Color to red (this is your POST color)
  • Check the “Superimpose Session” at the bottom left, then click the Session Setup button
    • Choose your first superimposition tracing (we’ll use PRE for this one)
    • Change the “Layer Color” from Full Color to black (the PRE color)
    • Be sure “Full Scaling” is toggled on
    • Be sure “Grab Handles” is toggle off (these are the points you grab to adjust, but since we can’t adjust the superimp layers, this hides them)
    • Click “Load”
  • You should see both tracing layers loaded on top of each other
    • If you are adjusting the image, note that only the “Active/Current Analysis” can be adjusted – the other two are just visually superimposed. Normally, you wouldn’t adjust anything as each tracing has been previously completed
  • You can then directly Print/Export the superimposition by clicking on the printer or disk in the lower right
    • For Caseworx, you’ll want to use the Disk -> Export -> Export to File
    • Under the “Overlay Options” in the preview screen, be sure that the Superimposed Session item is checked. The settings should copy themselves in from the tracing automatically
      • Remember that “Superimposed Session” is the PREYou can also set the colors differently here should you need to. For IBO, Pre=Black, Red=Post, Green=Post+2

      • Be sure the “Show All Items” toggles are turned off – we only want the superimposer data from the script

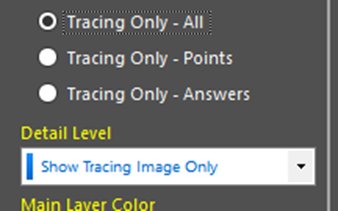
      • Under the “Tracing Image Options”, select the “Tracing Only – All” button – this hides the radiograph in the backgroundSet the “Detail Level” dropdown to “Show Tracing Image Only” – this disables the landmark labeling for a cleaner tracingAdjust the “Drawing Line Bias” if you want to make the lines thicker/thinner

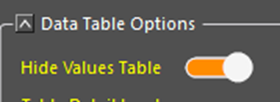
    • Under the “Data Table Options”, toggle the “Hide Values Table” to on – we only want the image and don’t need the data for superimposition

    • At the bottom left of the Preview screen, toggle the “Anonymize Identifiers” – this disables the nameplate to hide the patient & office names
  • This file is the two-way superimposition that’s ready to Import into Caseworx!